
- Greek Dogs by Supper For a Steal
- Pasta with Sausage and Broccoli by Bobbi’s Kozy Kitchen
- Grilled Chicken Caesar Salad by Magnolia Days
- Double Duty Fajita Chicken: Nachos Supreme and Enchiladas by Doggie at the Dinner Table
- Zucchini, Corn and Bacon Crepes by Vintage Kitchen
- Oregon Shrimp Quesadillas by Pescetarian Journal
- Korean omelet rice by Crispy Bits & Burnt Ends
- Lemon Dillled Salmon Croquette Burgers by Granny’s Down Home Southern Cooking
- Gluten Free Pepper Steak with Rice by No One Likes Crumbley Cookies
- Crispy Ravioli in Cherry Tomato Sauce by Shockingly Delicious
- BLT Soup by Meal Planning Magic
- Korean Pan-Fried Fish by Kimchi Mom
- Stove top mac ‘n cheese by Gotta Get Baked
- Deconstructed Enchiladas by In the Kitchen with KP
- Croque Monsieurs by Juanita’s Cocina
- Summer Squash and Mushroom Quesadillas by Chocolate Moosey
- Seared Lamb on a bed of Mashed potatoes with Artichoke Hearts by Cooking Underwriter
- Pasta with Creamy Kale Pesto by Webicurean
- Baked Spanish Tortilla by Happy Baking Days
- Grilled Chicken Caesar Pizza by In the Kitchen with Audrey
- Chicken Pasta with Spinach and Beans by The Lemon Bowl
- Tomato Pie by My Catholic Kitchen
- Shredded Chicken in Peanut Sauce Tacos w/ Corn & Zucchini Sauté by GirliChef
- Tomatillo Chicken Stew by Small Wallet, Big Appetite
- Pollo a la Crema by La Cocina de Leslie
- Baked Tilapia Fish Tacos by Home Cooking Memories
- Grilled Lemon Pepper Chicken with a Yogurt Dill sauce and a Greek Salad by Noshing with the Nolands
- Wagon Wheel Pasta with Pancetta & Peas by Chelsea’s Culinary Indulgence
- Lemon & Dill Shrimp Pasta w/ Oven Roast Corn by Mama, Mommy, Mom
- Ricotta – Tofu Tomato Toasts by Yummy Smells
- One Pot Spicy Asian Chicken and Rice by Hezzi D
- Turkey Italian Brown Rice Casserole by Momma’s Meals
- Flatbread Pizza with Cilantro Garlic Sauce by Mom’s Test Kitchen
- Kung Pao Shrimp by Mangoes and Chutney
- Cashew Chicken Stir-fry by Diabetic Foodie
- Chicken Bacon Avocado Quesadillas by Dinners, Dishes and Desserts
- Roasted Butternut Lo Mein by The Meltaways
- Potluck Casserole with Cornbread Stuffing by Cindy’s Recipes & Writings
- Jerk Chicken Chili by Mrs. Mama Hen
- Loaded Chicken and Steak Stuffed Potatoes by Big Bears Wife
- Steamed Tofu Serve with Fried Mix Vegetables by My Trials in the Kitchen
- Pasta with sausage and cherry tomatoes by Tora’s Real Food
- Chicken Ravioli with Peas and Bacon by Daddy Knows Less
- Chorizo Tomato Pasta with a Creamy Sauce by Avocado Pesto
- Quick N Easy Thai Coconut Shrimp Stir Fry by Sue’s Nutrition Buzz
- Whole Wheat Pizza with Hummus & Fresh Greens by Family Spice
- End of Summer Grilled Peach and Chicken Salad by Sustainable Dad
- Teriyaki Tuna Bowl by Family Foodie
- Weeknight Stir Fry by From Fast Food to Fresh Food
- Baked Egg with Mushrooms and Bacon by Pippi’s in the Kitchen Again
- Taco Bake by Daily Dish Recipes
- Fried Rice and Black Beans by Mama’s Blissful Bites
- Chicken with Broccoli, Sun-dried Tomatoes and Bow Ties by That Skinny Chick Can Bake
- Pasta in Tomato sauce and turkey meatballs by Basic & Delicious
- Pasta Primavera by Midlife Road Trip
- Tots Your Tots Will Love by The Hand that Rocks the Ladle
Showing posts with label spicy. Show all posts
Showing posts with label spicy. Show all posts
Friday, June 19, 2015
Spicy Thai Peanut Noodle Salad A Perfect Summer Potluck Dish
Hard to believe, but it’s just under a week until July 4th! Between now and then, I’ll be sharing recipes that are perfect for celebrating with family and friends! I’ve got a fun twist on potato salad to share for this week’s #SundaySupper...as well as a firecracker of a burger recipe and a fun vanilla treat...coming up in the next few days. Today, I’m kicking things off with a flavorful Spicy Thai Peanut Noodle Salad. It’s perfect for taking to summer potlucks, because it’s delicious both cold and at room temperature...and it contains no dairy products.
As soon as I saw this recipe on the Cooks Country website last week, I immediately added it to this weeks menu! Cook’s Country is part of the America’s Test Kitchen family, and their recipes never disappoint! What’s not to like? They do all the trial-and-error work for you. All you have to do is make the final kitchen-tested, no-fail recipe and enjoy the compliments! I used their peanut-based dressing recipe and prep technique, but I did make a few small tweaks. I added sriracha to the dressing instead of the suggested Tabasco, and I changed the veggies up just a bit. I used crunchy cucumber and carrot, as well as a double shot of onions This salad is knock-your-socks-off good!
Spicy Thai Peanut Noodle Salad
adapted from Cooks Country

Step 1: Cook 1 lb. of spaghetti in a pot of well-salted water. While the pasta cooks, make the dressing. Add the following ingredients to a large bowl: 3/4 cup chunky peanut butter, 1/3 cup soy sauce, 3 tbs. vinegar, 1 tbs. grated fresh ginger, 1 tbs. sriracha (or Tabasco), 1 tsp. honey, 1/3 cup of the starchy pasta cooking water, and 1 tsp. dried cilantro. Whisk well to combine and set aside.

Step 2: When the pasta is cooked, drain well in a colander under cold water. Keep rinsing until the pasta has cooled to room temperature. Place the cooled spaghetti in a large bowl and add 2 tbs. sesame oil...toss to evenly coat. Add the following veggies: 1/2 a cucumber seeded and cut into a small dice, 1/2 cup carrot cut into bite-sized pieces, 4 sliced green onions, and 1/2 cup sweet yellow onion cut into thin matchstick slivers.

Step 3: Add the reserved dressing and 2 tbs. chopped flat-leaf parsley. Toss everything together with tongs. Make sure that the dressing evenly coats all the noodles and the veggies. Serve immediately at room temperate or chill. The original recipe notes that you should remove chilled pasta from the fridge about 20 minutes before serving for the proper consistency.


Saturday, February 14, 2015
Halloween Spookyfood with Friedas Produce Featuring Spicy Purple Sweet Potato Oven Fries with Green Goo Dipping Sauce


Spicy Purple Sweet Potato Oven Fries
with Green Goo Dipping Sauce
adapted from Frieda’s…and a Friend’s Spicy Ranch

Ingredients for 2-3 servings:
For the oven fries:
- 1 large Stoke’s purple sweet potatoes, peeled
- 2 tbs. olive oil
- 1 tsp. finely chopped parsley
- 2 cloves garlic, finely minced or grated
- 1 tsp. dried cilantro
- 1 tsp. chili powder
- Sea salt and cracked black pepper to taste.
For the Green Goo Dipping Sauce:
- 8 ounces light sour cream
- ½ cup mayo
- 1 packet ranch dip mix
- 2 tbs. chopped cilantro
- 1 jalapeno, seeds and membranes removed
- 3 green onions, cut into rough pieces
- Juice of 1 lime
- 2 tbs. water
- 1 tbs. olive oil
Directions:
Step 1: Preheat oven to 400. Line a large rimmed baking sheet with foil or parchment; set aside. Cut the sweet potato into matchstick pieces 1/2-inch wide. For even cooking, try to get the pieces even thickness. Combine the olive oil, parsley, garlic, cilantro, and chili powder in a large bowl. Add the sweet potatoes and toss to evenly coat with the seasoned oil.
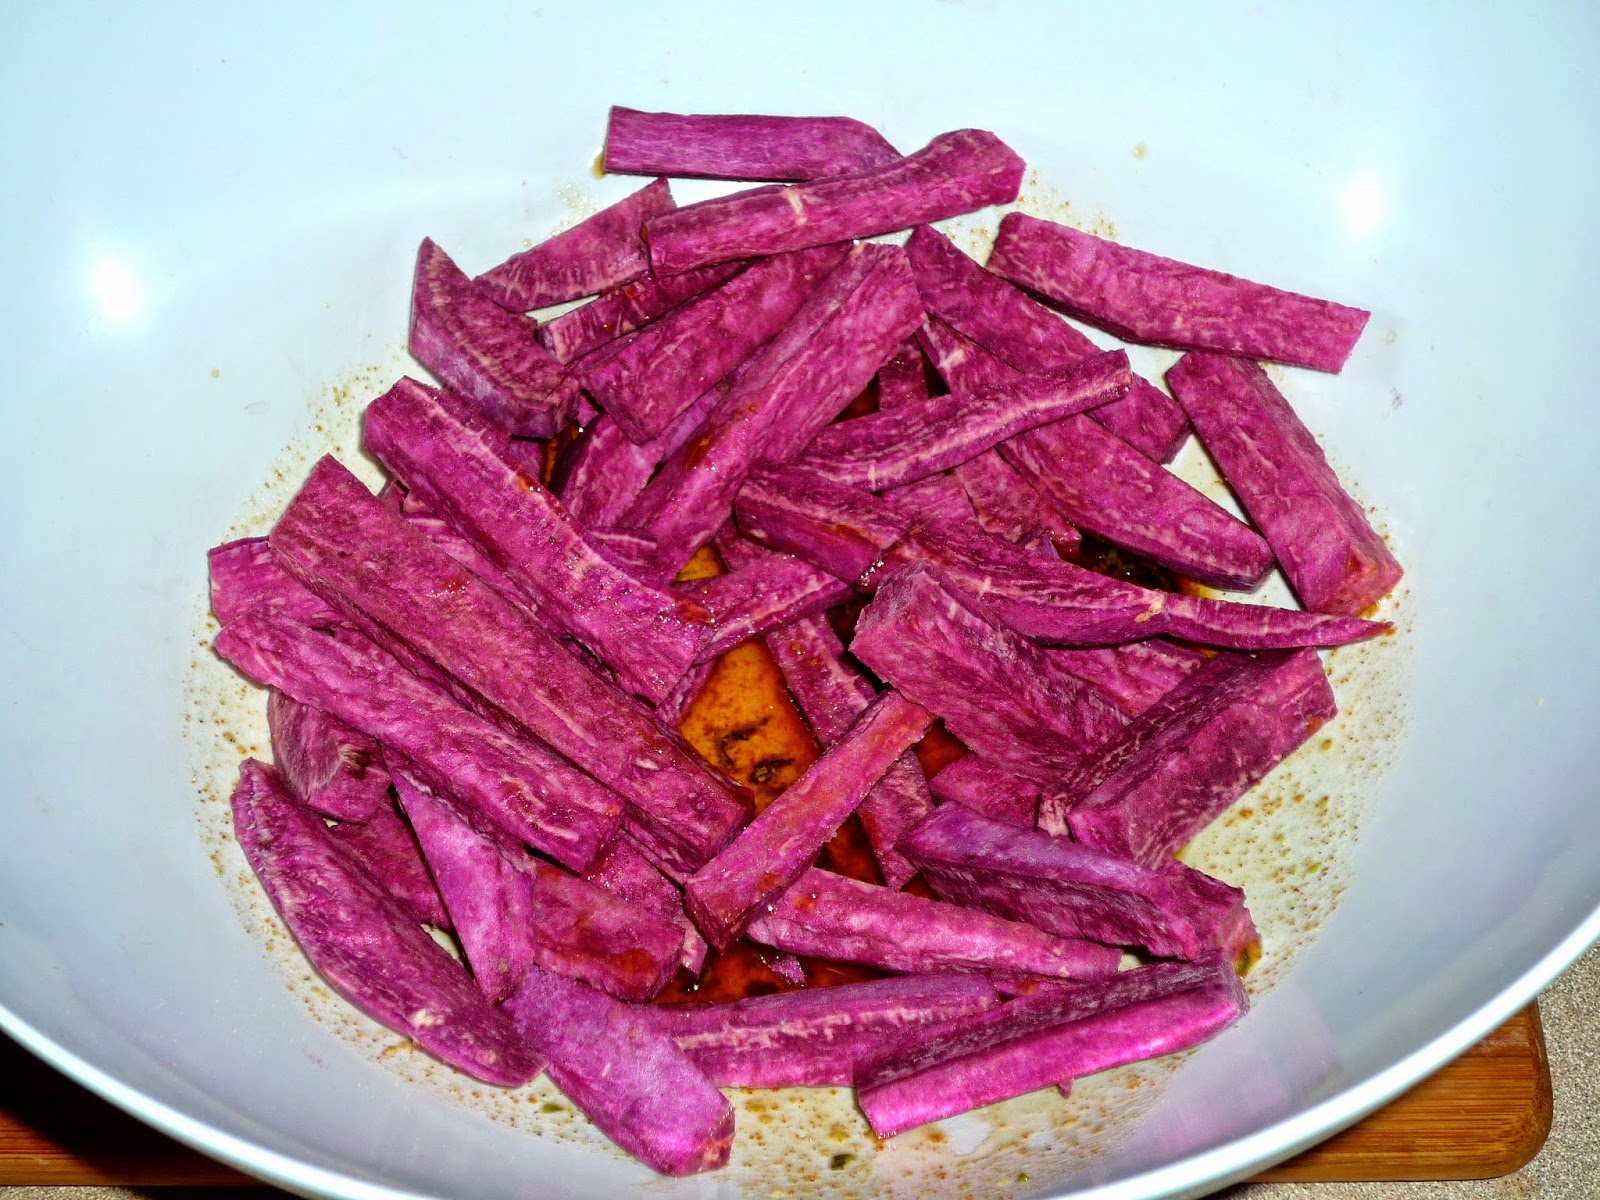 Step 2: Arrange the sweet potato fries on the rimmed baking sheet and sprinkle with salt & fresh ground pepper to taste. Bake for 20 minutes, then carefully flip them with a spatula. Add salt & pepper to the other side of the sweet potatoes and cook for an additional 10-15 minutes. The sweet potatoes should be browned and cooked through.
 Step 3: While the sweet potato fries bake, prepare the dipping sauce. Add the water, olive oil, and lime juice to a blender or small food processor. Top the liquid ingredients with the cilantro, jalapeno, and green onions. Process until the ingredients form a green puree. Add the sour cream, mayo, ranch dip mix, and green puree to a large mixing bowl. Stir well to combine and spoon into a bowl – I used a small metal “trick or treat” bucket from Dollar Tree!


 Step 4: To serve, place the sweet potato fries on a colorful Halloween platter. The plastic spiders I inserted among the fries are totally optional, but theyre a fun surprise when you bring the fries to the table! Serve the sweet potato fries with the container of “green goo” on the side for dipping.
 This is such a fun Halloween side – but it can be enjoyed anytime of the year! The sweet potato fries are lightly crispy, with a bright purple interior. The spice level is moderate, allowing the mellow sweetness of the potatoes take center stage. And the “green goo”? It provides an amazing burst of flavor! It’s moderately spicy and a little tangy -- with the familiar flavor of ranch shining through.
If you prefer your dip on the milder side, use only half of a seeded jalapeno – or leave it out all together. I won’t tell! The leftover "green goo" also makes an excellent dip for crispy tortilla chips. I also like to use it as a spread on top of chicken sandwiches or cheeseburgers. I hope youll give this fun recipe a try for Halloween...and let me know how your friends and family enjoy it!
Disclosure: Friedas provided me with Stokes purple sweet potatoes to facilitate this post. All opinions expressed are solely my own.
If you prefer your dip on the milder side, use only half of a seeded jalapeno – or leave it out all together. I won’t tell! The leftover "green goo" also makes an excellent dip for crispy tortilla chips. I also like to use it as a spread on top of chicken sandwiches or cheeseburgers. I hope youll give this fun recipe a try for Halloween...and let me know how your friends and family enjoy it!
Disclosure: Friedas provided me with Stokes purple sweet potatoes to facilitate this post. All opinions expressed are solely my own.
Wednesday, February 11, 2015
Happy Cinco de Mayo! Celebrate with Crispy Chicken Tortilla Rollups Spicy Avocado Crema a Chobani Yogurt Giveaway!!
NOTE: This popular recipe has been updated to provide a separate ingredient list and clearer preparation instructions. To get to the recipe, simply GO HERE!!
--------------------------------------------------------------------------------------------------------------------

Crispy Chicken Tortilla Rollups & Spicy Avocado Crema
a Weekend Gourmet Original
a Weekend Gourmet Original
Wednesday, February 4, 2015
Back to School SundaySupper Featuring Speedy Spicy Shrimp Pasta


Speedy Spicy Shrimp Pasta
inspired by Better Homes & Gardens

Step 1: Cook 8 ounces of angel hair pasta in well salted water. NOTE: I like to use Barilla Pasta Plus for its extra fiber and other healthy ingredients. Heat 1/4 cup olive oil in a large skillet over med-high heat. Add 1/3 cup slivered red onion, two grated cloves of garlic, and 1 or 2 generous pinches red pepper flakes. Once the veggies are softened, add 1 lb. shrimp and cook until pink.

Step 2: When the shrimp are cooked, add the following ingredients to the skillet: 2 tbs. butter, 1/3 cup chopped sun-dried tomatoes, the juice and zest of one Meyer lemon, two sliced green onions, and salt & black pepper to taste.

Step 3: Stir to combine and cook until the butter melts and combines into the lemon juice and olive oil to create a sauce. Drain the cooked pasta and add to the pan. Toss thoroughly to evenly coat all of the pasta with the flavorful sauce. Taste for seasoning and adjust accordingly...I had to add a bit more salt at the end for our taste. Use tongs to serve in individual bowls.


This quick pasta dish is really delicious...a little lemony, a little spicy, and all good! I especially loved the slightly sweet tang of the sun-dried tomatoes. Some time-saving things to keep in mind to make this dish come together lickety-split: while the water comes up to a boil, peel the shrimp. While the pasta cooks, chop the rest of the ingredients. Then, the actual cooking of the shrimp mixture and tossing with the cooked pasta takes less than 10 minutes! I served this dish with baked focaccia from the grocery bakery and a simple green salad.
I hope youll join the #SundaySupper gang tonight at 600 CST for a live Twiter chat to share back-to-school cooking ideas! In the meantime, make sure to check out all the fabulous and fast meals that my fellow #SundaySupper participants are sharing today:
Tuesday, February 3, 2015
October Secret Recipe Club Lemony Chicken Noodle Soup from A Fit and Spicy Life

I loved her addition of lemon and orzo, making this soup reminiscent of tangy Greek agvolemono soup. I had to make a few adjustments to her recipe based on ingredients that I had on hand in my kitchen. Due to some car issues, I wasnt able to get to the grocery store to buy orzo...so I had to improvise a bit to use what I already had on hand. That means I had to use egg noodles instead of orzo. I also subbed a combination of yellow onion and garlic for leeks, used chicken breast instead of thighs, and added a bit of corn that was in my freezer. Luckily, I already had dill and lemons in the kitchen -- which are the essential ingredients that give this soup its unique flavor.
Lemony Chicken Noodle Soup
adapted from A Fit and Spicy Life

- 1 tbsp olive oil
- 1 small yellow onion, diced
- 2 cloves garlic, minced or grated
- 2 stalks celery, sliced
- 2 carrots, peeled and chopped
- 1 cup frozen corn kernels
- 1 lb boneless, skinless chicken breast cut into bite-size cubes
- 6 cups chicken broth
- 8 ounces no boil egg noodles
- 1 tbsp dill
- 2 bay leaves
- A few dashes hot sauce
- Salt & pepper to taste
- Juice of 1 lemon
Directions:
Step 1: Add the olive oil to a Dutch oven over med-high heat. Add the onion, garlic, celery, and carrot. Cook, stirring occasionally, until the veggies have softened a bit -- about 10 minutes. Season with salt & pepper to taste.
 Step 2: Add the diced chicken breast to the Dutch oven. Cook, stirring occasionally, until the chicken is browned on all sides. Add the chicken broth, corn, and bay leaves. Bring the soup to a boil. Cover, reduce heat to med-low, and simmer for 20-25 minutes.
 Step 3: Add the egg noodles and cook until tender -- about 10 minutes. Just before serving, add the dill, hot sauce, and lemon juice. Stir well to combine and ladle the soup into serving bowls.
 This soup is so good...a comforting and filling complete meal in a bowl. The lemon juice and dill brought a unique flavor profile that elevated this soup above the usual chicken and noodle. I especially enjoyed the tart flavor that the lemon provided, and the addition of corn worked nicely with the carrots and celery. I cant wait to make this flavorful soup again during the upcoming cold-weather season!
Be sure to check out all of the great recipes that todays Secret Recipe Club participants are sharing -- youre sure to find something great to add to your upcoming menus!
Step 1: Add the olive oil to a Dutch oven over med-high heat. Add the onion, garlic, celery, and carrot. Cook, stirring occasionally, until the veggies have softened a bit -- about 10 minutes. Season with salt & pepper to taste.
Be sure to check out all of the great recipes that todays Secret Recipe Club participants are sharing -- youre sure to find something great to add to your upcoming menus!
An InLinkz Link-up
Spicy Goodness Easy Cheesy Chicken Enchiladas for WeekdaySupper


I saved even more time by using the meat from a roasted deli chicken, pre-shredded chicken and a fresh chunky salsa to flavor my filling. This dish is full of gooey cheese and protein-rich chicken. After it bakes, you cut it into wedges and top with sour cream and more of the salsa. Its a cinch to make and feeds at least four people.
Easy Cheesy-Chicken Enchiladas
a Weekend Gourmet Original

Ingredients:
- 10 white corn tortillas, cut in half
- 16 ounces red enchilada sauce [I used Frontera Foods pouch enchilada sauce.]
- 2 cups shredded Mexican cheese blend
- 1 cup chunky salsa
- 3 cups shredded chicken
- 1/2 cup light sour cream (or Greek yogurt)
- 2 sliced green onions
- 1 tbs. chili powder
- Salt & pepper to taste
Directions:
Step 1: Make the enchilada filling by adding the chicken, 1 cup of the cheese, the salsa, sour cream, 1 sliced green onion, chili powder and salt & pepper to a mixing bowl. Stir until completely combined.

Step 2: Preheat oven to 375. Spray an 8-inch round cake pan with non-stick spray. Spread 1/4 cup of the enchilada sauce in the bottom of the pan. Layer tortilla halves on top of the enchilada sauce, overlapping to make a complete layer. Spread 1/4 cup of the enchilada sauce on top of the tortillas. Carefully spread half of the chicken mixture on top of the sauced tortillas.

Step 3: Repeat the layering process above. You will have two layers of tortillas and filling, ending with a top layer of tortillas. Carefully spread the remainder of the enchilada sauce on top, then sprinkle with the remaining 1 cup of cheese and 1 sliced green onion.


Step 4: Bake the casserole until baked through and bubbly, approximately 20 minutes. Let the enchilada bake set up while you pour drinks and set the table -- 5-10 minutes. To serve, cut the enchiladas into 4-6 wedges. Top with additional sour cream and salsa.

This dish is gooey comfort food at its best, offering all the flavors of enchiladas in an easy-to-assemble layered casserole. Its sort of an enchilada/lasagna hybrid...and very good. We loved the melty cheese, the earthy corn tortillas and the spicy enchilada sauce. The chicken provided a healthy dose of protein and made the entire dish very hearty. We served the Avocado-Mandarin Orange Salad that I featured for this months #TheSaladBar on the side, and it worked perfectly with this dish.
The next time youre craving enchiladas, I hope youll give my stacked casserole twist a try! I also hope youll check out all of this weeks #WeekdaySupper dishes too. All of them look delish, and theyre guaranteed to be family friendly and quick to make.
- Tuesday: The Foodie Army Wife – Creamy Farfalle with Peas & Carrots
- Wednesday: Doggie At The Dinner Table – After Work Chicken Stir Fry
- Thursday: Daily Dish Recipes – Roasted Vegetable and Chicken Pesto Penne
- Friday: Hezzi-D’s Books and Cooks - Baked Orange Chicken
Monday, February 2, 2015
Spicy One Dish Goodness That Green Sauce Spicy Chicken and Rice Featuring HEBs Primo Pick That Green Sauce

I’m so excited to announce my new partnership with Texas-based grocery chain HEB! Starting with today’s post, The Weekend Gourmet is going to be featuring one of their Primo Picks each month. Primo Picks are unique, tasty and cool products you likely have never heard of or tried before – some of them unique to HEB. Each month, I’ll introduce the featured product, share my thoughts, and showcase a recipe using the product as an ingredient. I’m kicking things off with an HEB-brand product: their addictive That Green Sauce.

That Green Sauce is a dip/sauce that is made from jalapenos and other ingredients. It is indeed green, and it packs quite a punch…more than I was expecting, actually! It’s labeled Medium on the jar, but I would personally place it more in the Hot category. It’s spicy, delicious, and addictive! You can eat it right out of the jar with tortilla chips for a snack, pour it over scrambled eggs at breakfast…or you can use it to create a spicy one-dish dinner! I decided to make a spicy version of a comfort classic: chicken and rice. My That Green Sauce Spicy Chicken and Rice is perfect for busy weeknights. Once you mix the ingredients up, the oven does the rest of the work. I used a double shot of That Green Sauce: to flavor the rice AND spread on top of each chicken breast to give the dish some extra kick.
That Green Sauce Spicy
Chicken and Rice
a Weekend Gourmet original

Step 1: Preheat oven to 375. Salt and pepper 1 lb. boneless chicken breasts. Brown chicken on both sides in a skillet with a bit of olive oil over med-high heat. Reserve while you assemble the rest of the dish. Combine the following ingredients in a large mixing bowl: 1 can reduced-fat cream of chicken soup, ½ cup HEB That Green Sauce, ¾ cup converted white rice, ¾ cup frozen corn kernels, 1/3 cup finely chopped onion, 1 tsp. cumin, 1 tsp. coriander, 1 tsp. dried chives, and 1 tsp. chili powder.

Step 2: Stir well to thoroughly combine and spoon into a 13x9 pan or a casserole dish. Place the reserved chicken breasts on top of the rice mixture, cover tightly with foil, and bake for 45 minutes.

Step 3: Remove the foil from the pan and spoon some That Green Sauce on top of each chicken breast and sprinkle with a generous amount of co-jack cheese. Salt and pepper to taste and place back in the oven for 15 minutes, until the cheese is bubbly. To serve, place some of the rice mixture on a plate and top with one of the cheese-topped chicken breasts.


This simple, comforting dish earned high marks from Michael…he said the spice level was perfect and asked for seconds. Husband-approved is always a good sign! For me, the heat of the sauce was tempered just enough by the other ingredients in the dish to notice the heat…but not enough for it to overpower. The rice is creamy, and I loved the addition of corn for texture and flavor.
The chicken stayed moist and juicy and was full of flavor thanks to a smear of That Green Sauce and the melted cheese on top. This recipe’s a keeper! You can find That Green Sauce at all Texas HEB grocery stores. It’s delicious and versatile, so you can bet I’ll be keeping a jar of it on hand in my kitchen at all times! I’m thinking it will make a great component for a really good tortilla soup this winter…
Disclosure: HEB provided me with a jar of That Green Sauce to facilitate this post. My opinions are my own.
Monday, January 26, 2015
Spicy Vegetable Matzoh Ball Soup

There are many reasons to embark on cooking projects. But last week, as unseasonable wintery winds were whipping through the cracks in our house, I had one main motivation: to cook meals that kept the stove and oven on as long as possible. Time for slow roasting, and batches of cookies. And soup.
Matzoh ball soup has a heavy rotation in our household, especially during the winter months. The traditional version is fairly simple: dumplings in a clear dill-scented broth, with just a few carrots and parsnips and a handful of noodles. Its delicious, and especially welcomed when youve got a sore throat or some sniffles. But sometimes you want something a bit more interesting. This matzoh ball soup is chock full of vegetables and spicy with chile flakes. Its like your favorite vegetable soup, with the added bonus of some delicious dumplings.
This batch makes a huge amount (I usually split it between two pots). Feel free to halve it, if youre not feeding an army, or make the full amount and freeze some.

Spicy Vegetable Matzoh Ball Soup
adapted from a recipe developed by Gillian Rosicky, via her sister
yields two large pots
There is an ongoing debate in the matzoh ball soup community about floaters vs. sinkers: whether your dumpling is tender or toothsome. These fall on the latter side of the spectrum. I think that a more substantial matzoh ball makes a nice complement to the vegetables in this soup, but if you favor a lighter dumpling, just reduce the amount of matzoh meal by a few tablespoons.
Soup:
2-3 Tbsp olive oil
2 onions, chopped
4 shallots, minced
6 cloves garlic, minced
3-4 carrots, sliced
1 sweet potato, peeled and cut in a 1/2" dice
1/4 tsp cloves
a few hefty pinches chile flakes (depending on how hot you like it)
1 28-oz can chopped tomatoes
12 cups vegetable or chicken broth (more, if needed)
3 small zucchini, sliced into thick half-moons
8 shiitke mushrooms
2-3 cups broccoli florets
1/4 cup chopped fresh basil (optional)
salt and pepper to taste
Matzoh Balls:
3 Tbsp butter or oil
5 scallions, chopped
2 Tbsp broth
4 large eggs
1 1/2 tsp coarse salt
1/4 tsp pepper
1/2 tsp baking powder
1 cup matzoh meal
Heat the oil in a medium skillet. Saute the onions, shallots, garlic, carrots and sweet potato until the onions are soft and translucent. Add the cloves and chile flakes. Pour in the broth and tomatoes, and simmer for about 15 minutes.
When you add the broth to the soup, prepare the matzoh balls: warm the butter or oil in a skillet over a medium heat, and cook the scallions until softened (this will just take a minute or two). Let cool somewhat. In a separate bowl, beat the eggs and broth with the spices, baking powder, and matzoh meal. Add the onions and their butter/oil, and chill in the refrigerator.
Return to the soup: after the onions and such have been simmering in the broth and tomatoes for 15 minutes, add the zucchini, broccoli and shiitake mushrooms. Add more broth if needed. Simmer another 15 minutes. Take the matzoh ball dough out of the refrigerator (it will have been chilling about half an hour), and shape into small 1" balls, using either a small scoop, two spoons, or your hands (use some oil to keep it from sticking if you go this route). Plop these in the simmering soup as you shape them. Simmer another 30 minutes or so, stirring occasionally. You want the matzoh balls to be light and puffy and cooked through, and the vegetables to be very tender. When the soup is done, season to taste, and top with the fresh basil.
Subscribe to:
Posts (Atom)