Showing posts with label club. Show all posts
Showing posts with label club. Show all posts
Thursday, May 7, 2015
October Secret Recipe Club Featuring Bacon Maple Breakfast Crescents
 |
| Bacon-Maple Crescents...salty-sweet and SO simple to make!!! |
Shelbys original recipe calls for a sheet of crescent dough, but I wasnt able to find that despite checking several grocery stores. I just bought a can of regular crescent dough and improvised by making crescents instead of rolls. The only other changes I made to the recipe were to add a touch of cinnamon and vanilla extract to the filling and the glaze. The combo of sweet maple and smoky/salty bacon will BLOW your mind!


Step 2: Preheat oven to 375, and place parchment on a large baking sheet. Unroll a package of crescent dough and separate into 8 individual triangles. Spread 1 tsp. of the filling onto each triangle and sprinkle with a generous amount of the crumbled bacon. Roll up and place point side down on the cookie sheet, making sure to leave room for them to puff up as they bake. Bake the crescents for 10-12 minutes, until they are golden brown.
Bacon-Maple Breakfast Crescents
adapted from The Lives and Loves of
Grumpys Honeybunch
Step 1: Cook 8 slices of bacon until crisp; drain well and crumble. Set aside while you make the filling. To make the filling add the following ingredients to a bowl: 2 tbs. softened butter, 3 tbs. pure maple syrup, 1 tsp. high-oil cinnamon, and 1 tsp. vanilla extract. Whisk well to thoroughly combine.


Step 3: While the crescents bake, make the glaze by adding the following ingredients to a small bowl: 2 tbs. melted butter, 2 tbs. maple syrup, 1 tsp. vanilla, 1/2 tsp. high-oil cinnamon, and 1/2 cup powdered sugar. Stir well to combine and set aside. Let the baked crescents cool 5 minutes before glazing. For some reason, my glaze was more like an icing...so I spread it on the warm crescents with a knife, and sprinkled a bit of leftover bacon pieces on top. The warmth of the rolls made the icing turn into a nice glaze.


Wow...I LOVED these crescents! Flaky pastry filled with bacon and a sweet maple-cinnamon filling...and then topped with a sweet glaze and MORE bacon. Sign me up! I may have eaten two of them warm from the oven for breakfast...just saying. These are addictive, and using refrigerated crescent dough makes them easy enough to whip up on a busy weekend morning. Theyre easy to make, but fancy enough to serve company.
I hope you visit Shelbys blog to check out all of her fabulous recipes! While youre at it, check out all of the fabulous recipes that Group A Secret Recipe Club members are sharing today...they look fabulous.
);

Tuesday, April 7, 2015
May Secret Recipe Club Featuring Peanut Butter Granola Crispy Bars

These addictive granola bars have a great texture thanks to the addition of crispy rice cereal...but the addition of oatmeal makes them a bit hearty as well. I added 1 tbs. of cinnamon to the mix, but otherwise followed her recipe pretty closely. I used crunchy peanut butter instead of smooth, because thats what was in my cupboard...and I doubled the amount of vanilla she called for. We enjoyed having these crispy granola bars for breakfast with a piece of fruit or yogurt, and they also make a great after-work snack to tide you over until dinner. If you love chocolate and peanut butter paired up, youre going to go nuts for these easy-to-make granola bars.
Peanut Butter Granola Crispy Bars
adapted from Kitchen Trial and Error


Ingredients:
- 1/4 cup butter
- 1/4 cup honey
- 1/4 cup peanut butter [NOTE: I used crunchy]
- 1/4 brown sugar
- 1 tsp. vanilla extract
- 1.5 cups crispy rice cereal
- 1.5 cups oats
- 1 tbs. cinnamon
- 1/2 cup mini chocolate chips
Step 1: Line an 8x8 pan with parchment paper; set aside. Add the butter, honey, peanut butter, and brown sugar to a small saucepan. Heat over low heat until the butter melts, then use a spoon to stir until combined and smooth. Add the vanilla extract.


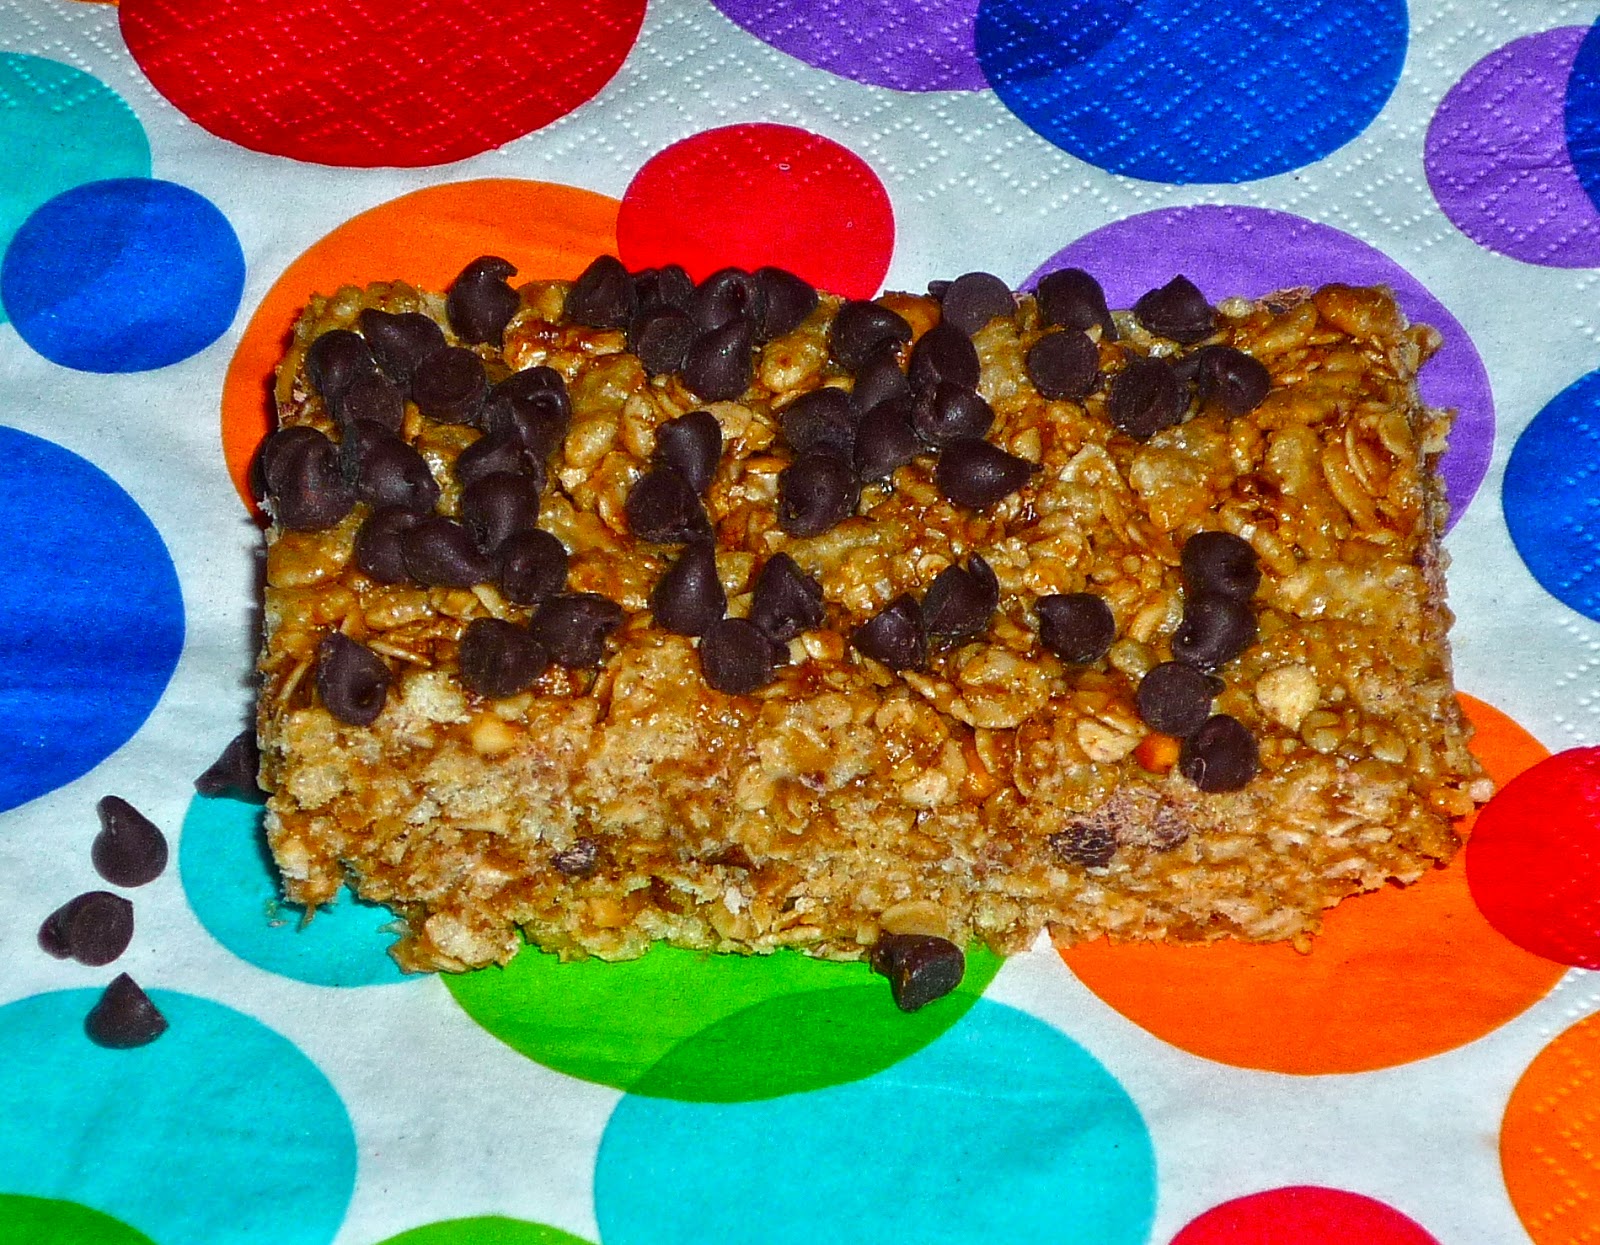
I hope youll give these amazing granola bars a try very soon...and I hope youll check out the rest of the amazing recipes that my fellow Secret Recipe Club participants are sharing today.
An InLinkz Link-up
Saturday, February 14, 2015
June Secret Recipe Club Featuring Cinnamon Banana Muffins
Hi, friends! Im back home in San Antonio (and the summer temps) after a weeklong vacation in Portland and the surrounding area. We saw so many wonderful sites, had a great visit with my brother-in-law and sister-in-law, and sampled some of the areas best food and wine!! Ill be sharing a two-part blog series about my trip this Wednesday and Friday. But first? Its time for one of my favorite monthly blog events: Secret Recipe Club!! My assigned blog this month is The Pink Apron. What a fun blog...so full of amazing recipes to choose from. Kelly is my kind of gal! She lives in Chicago, one of my most favorite cities to visit...and she loves artisan cheese. I think she would be a great foodie friend to grab a margarita at Frontera Grill the next time were in Chicago!!
With vacation looming on the horizon, I was looking for something quick and easy to make this month. I had two VERY ripe bananas in my kitchen, so her Cinnamon Banana Muffins immediately caught my eye!! Then, I came across some super-cute muffin liners with monkeys and bananas later that day. I took it as a sign...so I ran home and whipped up a batch of these yummy muffins to take to the office the next morning. They were simple to whip up, and my kitchen smelled wonderful while they baked. The only changes I made to the recipe were to add some Vietnamese cinnamon and some vanilla bean paste to the batter...and I used white chocolate chips and some chopped pecans instead of the suggested cinnamon chips. I looked in two stores and couldnt find the cinnamon chips, so I opted to use white chocolate instead. The nuts were a last-minute inspiration when I found them in my baking stash.
Cinnamon Banana Muffins


);
With vacation looming on the horizon, I was looking for something quick and easy to make this month. I had two VERY ripe bananas in my kitchen, so her Cinnamon Banana Muffins immediately caught my eye!! Then, I came across some super-cute muffin liners with monkeys and bananas later that day. I took it as a sign...so I ran home and whipped up a batch of these yummy muffins to take to the office the next morning. They were simple to whip up, and my kitchen smelled wonderful while they baked. The only changes I made to the recipe were to add some Vietnamese cinnamon and some vanilla bean paste to the batter...and I used white chocolate chips and some chopped pecans instead of the suggested cinnamon chips. I looked in two stores and couldnt find the cinnamon chips, so I opted to use white chocolate instead. The nuts were a last-minute inspiration when I found them in my baking stash.
Cinnamon Banana Muffins
adapted from The Pink Apron
Step 1: Preheat oven to 350. Line a muffin tin with 12 paper liners and set aside. Add the following ingredients to a mixing bowl: 1 1/2 cups mashed very ripe bananas (the more ripe, the better!), 3/4 cup sugar, 1/4 cup canola oil, 1/4 cup skim milk, 1 tsp. vanilla bean paste (or vanilla), and 1 large egg. Whisk well to combine. Set aside.
Step 2: In a second bowl, combine the following ingredients: 1 1/2 cups cake flour, 1 1/2 tsp. baking soda, 1 tsp. Vietnamese cinnamon, and 1 tsp. salt. Make a well in the center of the dry ingredients and add the reserved wet ingredients. Stir just to combine, then gently fold in 1 cup white chocolate chips and 1/2 cup pecans.
Step 3: Add the batter to the muffin liners, filling each about 3/4 full. Bake for about 20 minutes, or until a toothpick inserted comes out clean. Let the muffins cool for 15 minutes before placing on a serving platter and digging in!
These muffins are really good...the texture is dense and moist, and the intense banana flavor really shines through!! The pockets of melted white chocolate and crunchy nuts were really nice accents. I took these to work, and my co-workers gave them a big thumbs up. I really loved the whimsical papers...the bananas and monkeys let everyone know exactly what they were about to eat. Im not monkeying around when I say I hope youll give these muffins a try very soon! While youre at it, make sure to check out all the great Group C SRC offerings that are being shared today!!
);
Thursday, February 12, 2015
Secret Recipe Club Holiday Cookie Carnival Featuring Salted Peanut Butter Cookies with Snickers

 After looking at my calendar today, its slowing sinking in: Christmas is NEXT WEEK! Im woefully behind on my shopping this year, but plan to work on completing it this week. At least my decorating is done...and Ive narrowed down my cooking and baking list. Today, Secret Recipe Club is sharing some fabulous holiday cookies as part of our Cookie Carnival. I was so happy to be paired with my #SundaySupper friend Susan from The Wimpy Vegetarian. She always shares such great recipes -- and her photographs are just mouthwatering! I knew that I wanted something a bit different...and easy...for this fun event. I knew I had found just what I was looking for with her Salted Peanut Butter Cookies with Chocolate Nuggets.
These are seriously the easiest and most delicious peanut butter cookies Ive ever tasted -- and Im crazy about their salty-sweet flavor combination. The only change I made to Susans recipe was to use bite-size Snickers candies in place of chocolate chips. My officemate Kim makes amazing chocolate chip cookies with pieces of Snickers, and I thought it would work really well here too. These cookies are truly swoon-worthy! Anyone who loves true peanut butter flavor will flip for these cookies. Im also betting that Santa would love to find a plate of these waiting on Christmas Eve!
Salted Peanut Butter Cookies
with Snickers
adapted from The Wimpy Vegetarian

Ingredients (makes 15 medium-sized cookies):
- 3/4 cup brown sugar
- 1 large egg
- 1 tsp. baking soda
- 1/2 tsp. vanilla extract
- 1 cup peanut butter
- 1 tsp. sea salt flakes
- 15 Snickers bites
Directions:
Step 1: Preheat oven to 350. Line a large rimmed baking sheet with parchment and set aside. Using a mixer, cream together the brown sugar, egg, baking soda, and vanilla extract. The mixture will begin to foam up a bit, so dont panic! Add the peanut butter and mix in completely -- a nice dough will form. Fold in the Snickers pieces with a sturdy spoon or spatula.

Step 2: Using a small cookie scoop, place 15 rounds of dough on the prepared baking sheets. Leave about 1.5 inches between each cookie. Make sure that each cookie has one Snickers bite. Lightly sprinkle the top of each cookie with a sprinkle of the sea salt flakes.

Step 3: Bake for 10-12 minutes, or until the surface of the cookie feels firm. The cookies will look very soft -- but thats normal. Remove the baking sheet from the oven and let the cookies cool on the baking sheet to firm up. I let my cookies cool for 30 minutes before moving them to a serving plate. As the cookies cool, they morph into the perfect chewy cookie.


These cookies are seriously a win-win: easy to make, excellent texture, and a great combination of salty and sweet! The cookies are moist and chewy, and the addition of the Snickers took them right over the edge -- during baking, the candy pieces melt. The end result is a bit of caramel, nuts, chocolate, and nougat in each bite. These cookies were a huge hit in my office, and I cant wait to make another batch for my Christmas cookie tray!
Be sure to check out all of the great holiday cookies that my Secret Recipe Club friends are sharing today. Weve got something for everyone...and they all would make a fabulous addition to any holiday cookie tray!
An InLinkz Link-up
Saturday, February 7, 2015
July Secret Recipe Club Featuring Pesto Pasta Salad

Its Winter in Australia, so a pasta salad may seem odd to Claire when she reads this. However, its 90+ here in Texas now that its July, so a cold pasta salad is just what we were looking for this weekend. I made one tweak to Claires original recipe, subbing diced Roma tomato and sweet corn kernels for the roasted sweet potato in her recipe. I had those veggies on hand, and it seemed a bit more Summery. This pasta salad can be made up to a day ahead, making it perfect for busy warm-weather entertaining. Feel free to use any pasta you like, but I opted to use a healthy high-protein, high-fiber pasta. Wait until you see how easy this great pasta salad is to whip up!
Pesto Pasta Salad
adapted from Claire K Creations

Ingredients:
- 14.5-ounce box corkscrew pasta
- 1/2 cup prepared pesto
- 1 tbs. extra virgin olive oil
- 1/2 cup crumbled feta
- 1 cup baby spinach leaves
- 1 cup frozen corn kernels, thawed
- 1 Roma tomato, seeded and chopped
- Salt & pepper to taste
Directions:
Step 1: Cook the pasta in well-salted water according to package directions. Drain the cooked pasta and add to a large mixing bowl. Let the pasta cool for a few minutes. Then, add the pesto, olive oil, feta, spinach, corn, tomato, and salt & pepper.

Step 2: Stir with a sturdy spoon just until the ingredients are evenly combined -- being careful not to break up the feta cheese too much. Refrigerate the pasta salad until chilled -- about 4 hours. Transfer to a pretty serving bowl/platter and serve.

This pasta salad is amazing! I love how the pesto flavors the pasta with basil, parmesan, garlic, olive oil, and pine nuts. The warm pasta wilts the spinach perfectly, and the feta provides a tangy burst of flavor. The combo of tomato and corn just screams Summer. I especially love that this pasta salad is light and refreshing -- unlike mayo-based pasta salads. I can see myself making this great pasta salad all Summer long.
I hope youll check out the other recipes that my fellow Secret Recipe Club members are sharing today. I always find at least one or two new recipes to try out each month, and this month is no exception. Click the links below to visit that recipes page.
An InLinkz Link-up
September Recipe Club Featuring Watermelon Feta Salad

This recipe is a snap to put together for a quick lunch, or as part of a healthy Summer dinner. I picked up chopped watermelon at the grocery store, as well as crumbled feta cheese. I made a quick homemade balsamic vinaigrette in less than 5 minutes, so this salad is ready to eat in a flash! I made one small change to Beths recipe. I cant eat olives or bell pepper, so I decided to add some chopped hazelnuts for a bit of crunch. This salad is so good and really easy to make!
Watermelon & Feta Salad
adapted from Its Good to Be the Cook

Ingredients (for one salad):
- 2 cups Spring mix lettuce
- 1 cup watermelon, cut into even-sized rectangles
- 1/4 cup crumbled feta
- 1 tbs. finely chopped purple onion
- Chopped mint and cilantro to taste (optional)
- 2 tbs. chopped hazelnuts
- Simple vinaigrette: 1 tbs. olive oil, 1 tbs. balsamic, 1 tsp. honey, and salt & pepper to taste
Directions:
Step 1: Make the balsamic vinaigrette and toss it with the Spring mix, purple onion, mint, and cilantro. Arrange the greens toward the back of a serving plate.
 Step 2: Place the watermelon pieces decoratively in front of salad greens. Sprinkle the feta on top of the watermelon. Finally, sprinkled the chopped hazelnuts on top of the salad greens and watermelon-feta combo.

 See? Easy!! This salad is a great combination of flavors and textures. The sweet watermelon works perfectly with the tangy, salty feta...and the finely chopped onion provides a subtle onion flavor. The hazelnuts provide an earthy crunchiness, and everything is perfectly tied together by the sweet-tangy vinaigrette. This is one winner of a salad! If youve never thought of pairing watermelon and feta, let me assure you that the flavors are made to go together. One try, and Im better youll be as hooked as I am!
Wait until you see all of the great recipes that my fellow Group A Secret Recipe Club members are sharing today. Youre sure to find something new to add to your must-try list!
An InLinkz Link-up
Friday, February 6, 2015
July Secret Recipe Club Featuring Mixed Berry Cobbler from Dancing Veggies
Its that time again...time to share another fabulous recipe for Secret Recipe Club. For July, I was assigned Dancing Veggies...a blog with a great mix of veg-friendly recipes and baked goods. I had a great time reading through Amandas blog and looking over her wide array of recipes. Since Michael is an avowed carnivore, I decided that a sweet treat would be the best way to go this month. Since berries are in season...and weve never met a cobbler that we didnt like? I knew I found just what I was looking for with her gorgeous Mixed Berry Cobbler. Chock full of Summer berries and featuring a cake-like cobber layer, this dessert was right up my alley.

I made a few tweaks to Amandas recipe to suit our tastes. First off, I halved the recipe since theres just two of us at Casa Garcia. I also added a bit of vanilla bean paste to the berries, vanilla bean paste and a dash of cinnamon to the cobbler base, and a sprinkle of cinnamon sugar to the top of the cobbler during the last 5 minutes of baking. I love the flavor that cinnamon and vanilla add to most baked goods. This cobbler was assembled and ready for the oven in about 20 minutes, then the over did the rest of the work. Arent the colors of this cobbler gorgeous?!?!?
Mixed Berry Cobbler


);
Read more »
I made a few tweaks to Amandas recipe to suit our tastes. First off, I halved the recipe since theres just two of us at Casa Garcia. I also added a bit of vanilla bean paste to the berries, vanilla bean paste and a dash of cinnamon to the cobbler base, and a sprinkle of cinnamon sugar to the top of the cobbler during the last 5 minutes of baking. I love the flavor that cinnamon and vanilla add to most baked goods. This cobbler was assembled and ready for the oven in about 20 minutes, then the over did the rest of the work. Arent the colors of this cobbler gorgeous?!?!?
Mixed Berry Cobbler
adapted from Dancing Veggies
Step 1: Preheat oven to 375. Add half a stick of butter to an 8x8 pan and place in the oven to melt. While the butter melts, prep the rest of the ingredients. Add the following to a mixing bowl: 1/2 cup blueberries, 3/4 cup blackberries (cut in half), 1/2 cup raspberries, and 3/4 cup strawberries (quartered), 1/3 cup sugar and 1 tsp. vanilla or vanilla bean paste. Stir well to combine.
Step 2: Add the following ingredients to a large measuring cup: 1/2 cup AP flour, 1 tsp. baking powder, 1/2 cup sugar, 1 tsp. cinnamon, 1 tsp. vanilla bean paste, and 1/2 cup of milk. Whisk well to combine. The mixture will look about the consistency of pancake batter. Set aside.
Step 3: Remove pan from oven carefully -- its hot! Pour the batter evenly into the hot pan. Sprinkle the reserved berries on top of the batter. Bake until golden-brown and the berry juices are bubble -- approximately 25-3o minutes. Before the last 5 minutes of baking, sprinkle the top of the cobbler with a mixture of 2 tbs. sugar and 1 tsp. cinnamon. [Note: I turned the pan around in the oven halfway through baking to ensure even cooking.]
Step 4: Remove the cobbler from the oven and let cool for 5-10 minutes before serving. This allows the juices from the berries to firm up and reabsorb into the cobbler crust. Serve as is...or with a big scoop of Blue Bell Homemade Vanilla ice cream.


Wow...this is great cobbler! The edges are a bit crispy, and the inside is tender and cake-like. Its not overly sweet, and the combination of berries works really nicely together. We really enjoyed the background warmth that the cinnamon and vanilla provided to the overall flavor. This ones a keeper...and I can see using all kinds of great fruit combos with this cake-like cobbler base. Peach and raspberry...or maybe apple...perhaps? I hope youll check out all of the great recipes that my fellow Group A Secret Recipe Club friends are featuring today. To do so, click on one of the pictures below.
Wow...this is great cobbler! The edges are a bit crispy, and the inside is tender and cake-like. Its not overly sweet, and the combination of berries works really nicely together. We really enjoyed the background warmth that the cinnamon and vanilla provided to the overall flavor. This ones a keeper...and I can see using all kinds of great fruit combos with this cake-like cobbler base. Peach and raspberry...or maybe apple...perhaps? I hope youll check out all of the great recipes that my fellow Group A Secret Recipe Club friends are featuring today. To do so, click on one of the pictures below.
);
Thursday, February 5, 2015
April Secret Recipe Club Featuring Flourless Chocolate Toffee Cookies from Love and Flour
Its once again time for this months Secret Recipe Club reveal! This month, I was given a fantastic blog that was chock-full of all sorts of sweet delights: Love and Flour. I knew that I wanted to make some cookies, and she had a TON of great cookie recipes to choose from! Ultimately, I decided to go with her take on Francois Payards Flourless Chocolate Cookies. I made two small changes to her recipe: instead of adding chocolate chips to the brownie-like dough, I used what I had on hand in my pantry: pecans and toffee chips to make Flourless Chocolate-Toffee Cookies.
 These cookies are a snap to whip up using only a handful of ingredients that are in my kitchen all the time. You do have to allow about an hour for the cookies to cool, but youre rewarded with a dozen chewy, decadent chocolate cookies studded with pecans and bits of toffee. All you need is a glass of ice-cold milk and youre ready for the perfect afternoon snack or midnight snack!!


Read more »
Flourless Chocolate-Toffee Cookies
adapted from Love and Flour
adapted from Love and Flour
Step 1: Preheat oven to 375. Line a large rimmed baking sheet with parchment paper or a Silpat and set aside. Add the following ingredients to the bowl of a stand mixer: 3 cups powdered sugar and 3/4 cup Dutch process cocoa powder. Mix on low speed until the sugar and cocoa are combined. Add 1/2 cup chopped pecans and 1/2 cup toffee chips. Mix into the sugar-cocoa mixture on low speed until combined.
Step 2: Add 1 tbs. vanilla extract and the eggs whites from 3 large eggs. Mix on low speed just until the egg whites are incorporated and the mixture looks similar to brownie batter. If you overmix, the batter will be too stiff.
Step 3: Spoon the batter onto the baking sheet in 12 portions of about 1 tbs. Make sure to leave a bit of space between to allow for spreading as the cookies bake. Bake for 11-14 minutes, until the cookies are shiny and cracked on top. Make sure to turn the pan around halfway through the baking time for even baking. Remove the parchment from the cookie sheet and repeat the baking process using a fresh sheet of parchment. Cool the cookies on the parchment for approximately 1 hour, which will allow them to set up and not stick to the parchment.
These cookies are unbelievably good! They have a thin crisp exterior and a chewy, fudgy interior. They remind me a bit of really fudgy brownies. The nuts and toffee provide a bit of texture and crunch, but you could also use 1/2 cup of chocolate chips in place of either ingredient. These cookies are quite rich, so two cookies with a glass of milk was plenty for me to enjoy in one sitting. Make sure to store the cookies in an airtight container so they dont dry out.
);
Subscribe to:
Posts (Atom)