Showing posts with label giveaway. Show all posts
Showing posts with label giveaway. Show all posts
Friday, May 22, 2015
El Yucateco Hot Sauce Giveaway Featuring Caliente Frito Pie Deluxe SauceOn CollectiveBias
Disclosure: This shop and giveaway has been compensated by Collective Bias, Inc. and its Advertiser. All opinions are mine alone.

I recently discovered a new-to-me a habanero hot sauce that lets me #SauceOn to bring a burst of spicy heat to many of my favorite recipes. El YucatecoHot Sauce is made in Mexico and comes in four different spicy varieties: Red Habanero Sauce, Green Habanero Sauce, XXXtra Hot Kutbil-ik Sauce, and Black Label Reserve -- their newest flavor! Thanks to #CollectiveBias, I recently learned that all four flavors of El Yucateco hot sauce can be found in the Hispanic Foods aisle at Walmart.

If youve shied away from hot sauces made with habanero peppers in the past because you feared that theyd be TOO hot...dont! I found the El Yucateco Chile Habanero sauces very tasty. They definitely pack a fiery kick -- especially straight from the bottle -- but they also have lots of flavor. When added as a recipe ingredient, they bring a smooth heat...more of a slow burn than in-your-face fire. For example, I used the Black Label Reserve hot sauce to amp up a comfort classic: Caliente Frito Pie Deluxe. Let me show you how I took a gameday classic and gave it a grown-up twist.
Caliente Frito Pie Deluxe
a Weekend Gourmet Original


Ingredients (for one serving):
- 1 cup Fritos corn chips
- 3/4 cup of your favorite chili
- El Yucateco Black Label Reserve hot sauce to taste -- I used 1/2 tsp.
- 1/2 cup shredded colby-cheddar cheese
- 1 green onion, sliced
- 1/4 Roma tomato, diced
- 1/4 avocado, diced
- 2 tbs. sour cream mixed with 2 drops El Yucateco Black Label Reserved hot sauce
Directions:
Step 1: Preheat oven to 375. Place the corn chips in an oven-safe crock or serving bowl. Heat the chili, stir in the El Yucateco Black Label Reserve hot sauce, and pour over the chips. Top with the shredded cheddar. Bake at 375 until the cheese is melted -- about 5 minutes.

Step 2: While the cheese is melting, mix the sour cream with 2 drops El Yucateco Black Label reserve. Spoon the sour cream in the middle of the cooked Frito pie. Sprinkle the green onion, avocado, and tomatoes on top. Eat immediately, while the chips are still crunchy.


Thats it! In about 15 minutes, you can have a spicy deluxe version of plain ol Frito pie. The El Yucateco hot sauce definitely upped the spice factor of the chili, but the sour cream and avocado cooled each bite off very nicely. For those who really love their food spicy, additional El Yucateco can be sprinkled on top of their Frito pie. I enjoyed this fancier version of Frito pie much more than the traditional version I usually make. To make this dish for a crowd, simply multiply the ingredients by 4 and bake in a casserole dish.
Want to learn more about El Yucateco Hot Sauce? All you have to do is Like El Yucateco on Facebook or visit their Recipe Page. Then, make plans to join us at the bilingual #SauceOn Twitter Party for inspiration and ideas on how to bring more excitement to your everyday meals by using El Yucateco. We’ll be sharing delicious, exciting recipes using El Yucateco -- and there will be $550 in Walmart gift cards! Make sure to RSVP. Speaking of prizes...who wants to win a fabulous El Yucateco Prize Pack?!?!? The winner will receive a $75 Walmart gift card and a gift basket that includes El Yucateco products and apparel, a wood cutting board, and cheese knives! To enter, follow the instructions in the Rafflecopter below. Good luck!
Want to learn more about El Yucateco Hot Sauce? All you have to do is Like El Yucateco on Facebook or visit their Recipe Page. Then, make plans to join us at the bilingual #SauceOn Twitter Party for inspiration and ideas on how to bring more excitement to your everyday meals by using El Yucateco. We’ll be sharing delicious, exciting recipes using El Yucateco -- and there will be $550 in Walmart gift cards! Make sure to RSVP. Speaking of prizes...who wants to win a fabulous El Yucateco Prize Pack?!?!? The winner will receive a $75 Walmart gift card and a gift basket that includes El Yucateco products and apparel, a wood cutting board, and cheese knives! To enter, follow the instructions in the Rafflecopter below. Good luck!
a Rafflecopter giveaway
NO PURCHASE NECESSARY. El Yucateco giveaway ends on 8/29/14 at 6:00PM ET. Open only to (i) legal residents of the fifty (50) United States, the District of Columbia, and (ii) who are at least 18 years old at the time of entry. Void in PR and where prohibited. Sponsor: Collective Bias, Inc.

Tuesday, May 19, 2015
Review and Giveaway Kernel Encores Flavored Popcorn


- Blueberry Cheesecake
- Strawberries & Champagne
- Root Beer Float
- Strawberries & Cream (drizzled with white chocolate)
- Cotton Candy
- Peppermint
- Bananas Foster
- Orange Creamsicle
- Lemon Cream Pie
- Sea Salt Caramel
- Watermelon
- Hawaiian Delight
 In celebration of The Weekend Gourmets third anniversary this month, Kernel Encore is offering a 10% discount to my readers by visiting this special link. Theyre also going to give THREE of my readers their own customized 12-flavor popcorn sampler! Im introducing Rafflecopter for this giveaway, which Im hoping will streamline the giveaway process for everyone. Theres one mandatory entry and several options for additional entries. The required entry is to visit the Kernel Encore flavor page and comment via Raffelcopter telling me your favorite flavor. Good luck...lets get popping!!
a Rafflecopter giveaway
Monday, April 13, 2015
Spotlight and Giveaway New Yorks Salt of the Earth Bakery

-- Everything a cookie always wanted to be. ™
Have I got a treat for you today, especially if you love sweet and salty baked goods as much as I do! Salt of the Earth Bakery is located in New York, and they have a fabulous line of cookies and brownies that are flavored with a variety of finishing salts. During our April trip to New York, I had a chance to sit down with owner Alexandra Rabbani to learn more about this history of the company and sample some of her amazing products. We featured them in our article The Sweet Side of New York. Imagine how excited I was to find out that Salt of the Earth recently began shipping most of their baked goods all over the country via their website. Now I can get my fix without having to spring for airfare to New York!! Alexandra has a vibrant personality, and shes very passionate about her products. I am a huge fan of her cookies and brownies, so Im thrilled to be able to share them with you today. Alexandra recently sent me The Whole Shebang from her online store: three flavors of cookies plus three flavors of brownies, and one of you is going to receive the same sampler as well!


Im so thrilled to share Salt of the Earth Bakery with you today. Alexandra is going to give one of you your very own The Whole Shebang sampler described above so you can try her goodies for yourself! To enter the giveaway, youll need to visit the SOTE Bakery website. Then come back and tell me which item youre most excited to try. Make sure to leave me your e-mail address, so I can find you if youre the winner. I will accept entries until Thursday 8/8 at 1159 pm CST. I will notify the winner by e-mail the following day. Good luck!!
Disclosure: Salt of the Earth Bakery sent me one of their The Whole Shebang gift packs to facilitate this feature. However, all opinions expressed are my own.
Tuesday, March 17, 2015
Homemade Liqueur and Infused Spirits Review and Giveaway Featuring Blueberry Balsamic Liqueur


Because this liqueur is made with a combination of vodka and red wine, its a bit lower in alcohol than most liqueurs. I found Schlosss step-by-step directions in the book a snap to follow. The prep work to assemble the liqueur literally took less than 10 minutes, but you do need to allow 7 days for it to properly tincture. Thats all hands-off time, so all you have to do after the initial prep is be patient. After a week, youll be rewarded with a gorgeous purple liqueur that smells and tastes like sweet wild blueberries, with a back note of aged balsamic! Come see just how easy it is to make your own homemade liqueur.
Blueberry Balsamic Liqueur
from Homemade Liqueurs and Infused Spirits

Ingredients:- 2 pints fresh blueberries OR 1.5 lbs. frozen blueberries, thawed
- 2 cups simple syrup [2 cups sugar + 2 cups water microwaved until the sugar melts into the water.]
- 2 1/4 cups vodka
- 1 cup fruity red wine (Merlot or Cabernet)
- 1/4 cup aged balsamic vinegar
Step 1: Muddle the blueberries and simple syrup with a wooden spoon in a half-gallon jar. [NOTE: I used a half-gallon Ball canning jar.] Stir in the vodka, wine, and balsamic.


- Create a signature cocktail with your favorite flavors, perfect for adding a personal touch to a wedding or party
- Use your own homegrown fruits, vegetables, and herbs to make it really personal!
- Have ready-made creative housewarming or hostess gifts on hand anytime.
 For a Summer-inspired sparkling cooler that really showcased my sweet-tart liqueur, I simply combined 1/3 cup of my homemade blueberry balsamic liqueur with 12 ounces of Cascade Ice Wild Berry zero calorie sparkling water. The two simple ingredients were poured over ice cubes in a tall glass, and everything was given a stir with a straw. Easy peasy, and the flavors played perfectly with each other. Even better? I was able to put my drink creation together in a snap, making this perfect for al fresco Summer dinners or pool parties. Make sure to use a clear glass for this drink to show off its gorgeous shade of deep purple!
Now...who wants to get in their kitchen and make some homemade liqueur of their own?!?!?!? One lucky reader is going to receive their very own copy of this fantastic cookbook. To enter, simply leave a comment telling me your ideal liqueur flavor. Ill accept entries until Tuesday, May 6th at 1159 p.m., and Ill notify the winner via e-mail the following day. Good luck!
a Rafflecopter giveaway
Disclosure: I received a review copy of Homemade Liqueurs and Infused Spirits to facilitate this feature. The cocktail recipe suggestion is a creation of The Weekend Gourmet. All opinions expressed are solely my own.
Disclosure: I received a review copy of Homemade Liqueurs and Infused Spirits to facilitate this feature. The cocktail recipe suggestion is a creation of The Weekend Gourmet. All opinions expressed are solely my own.
Friday, February 27, 2015
Celebrating National Ice Cream Sandwich Day With a Giveaway of the I Scream Sandwich! Cookbook

Its August, which means that The Weekend Gourmet is celebrating its third anniversary all this month...and Im planning all sorts of fun things to commemorate this milestone!! Im starting the fun off with a fabulous cookbook giveaway to celebrate National Ice Cream Sandwich Day today. Jennie Schachts I Scream Sandwich! is a new cookbook that contains fantastic variations on the ice cream sandwich theme. Some of the recipes that immediately caught my eye include the Key Lime Pie (key lime ice cream and sugar cookies), Blueberry Muffin (blueberry sorbet on blueberry muffin top cookies), and Hawaiian Holiday (pina colada sorbet on macadamia cookies)! Each recipe provides a recipe for an ice cream, sorbet or frozen yogurt filling...and the corresponding "holder." This includes cookies, brownies...and a few unexpected surprises. The book is neatly organized into themed chapters that include Classics, World View, and Holidays and Special Occasions. The recipes are creative and FUN, and the photographs are positively mouth-watering.
I especially love that Ms. Schacht provides a Take It Easy option for all of the recipes. These tips tell you how to use store-bought cookies and/or ice cream options to save time, but still stay true to the recipes flavor profile...because sometimes youve got to have an ice cream sandwich NOW! Im going to be sharing my experience making the Key Lime Pie sandwiches later this month, just in time for your Labor Day celebrations. But, I wanted to whet your appetite just a bit and celebrate National Ice Cream Sandwich Day today. If you love PB&J, youre going to flip for the PB&J Sandwich, which features peanut butter ice cream on toasted brioche...with a homemade quick berry "jam." This isnt the ice cream sandwich you grew up with...its better!
PB&J SANDWICH: Peanut Butter Ice Cream on Toast with Berry “Jam”
from I SREAM SANDWICH!
Makes (up to) 12 sandwiches

Per Author Jennie Schacht:
This is my go-to sandwich when I am jonesing for one and there are none stashed away in the freezer. Sometimes I hope not to find a sandwich there, just so I can make this one, which delights with warm toast, cool ice cream, and the reassuring flavors of childhood. With ice cream awaiting in your freezer, a sandwich need never be more than a toaster away. I make these up one at a time when the mood strikes. If you’re hosting a child’s sleep-over party or have family in town for the holidays, make all twelve at once for an easy and memorable breakfast or midnight snack. Peanut butter is personal: Choose creamy for a smooth ice cream or chunky for more texture. In either case, look for a natural-style peanut butter made from only peanuts (salt optional), with no sweeteners or gums. I prefer a mild honey such as clover or orange blossom for this ice cream.
Peanut Butter Ice Cream | gluten free
- 2 cups whole milk
- 1/2 cup (100 grams) granulated sugar
- 1/4 cup (84 grams) mild-flavored honey
- 2 tablespoons tapioca starch or cornstarch
- 1/4 teaspoon kosher salt
- 2/3 cup (160 grams) natural peanut butter
- 1 cup heavy cream
- 1/2 teaspoon pure vanilla extract
1. Whisk 1/2 cup of the milk with the sugar, honey, tapioca, and salt in a medium saucepan until no lumps remain. Stir in the remaining 1 1/2 cups milk.
2. Heat the mixture over medium-high heat, stirring with a heatproof spatula, until it begins to steam and slightly bubble at the edges. Adjust to a simmer and cook, stirring constantly, until the mixture thickens to the consistency of a cream sauce, 2 to 3 minutes longer; do not fully boil.
3. Off the heat, add the peanut butter, give it a minute or two to soften, then stir until smooth and well blended. Stir in the cream and vanilla.
4. Transfer the mixture to a metal bowl set over a larger bowl of ice and water. Stir occasionally until the mixture is cool, taking care not to slosh water into the bowl. Cover and refrigerate until very cold, at least 2 hours. Transfer the bowl to the freezer for the last half hour before spinning it.
5. Freeze the mixture in an ice cream maker according to the manufacturer’s directions. When it is ready, transfer the ice cream to a chilled container, cover, and freeze until firm, at least 4 hours or overnight.
Toast and Berry “Jam”
- 1 to 12 slices good-quality sandwich bread, such as challah, bakery white or honey whole wheat
- Unsalted butter, for spreading on the toast (optional)
- 1 to 12 tablespoons Berry Ribbon (below) OR berry jam OR fruit spread
SANDWICH!
For each sandwich, toast 1 slice of bread until it is medium dark. Trim the crusts and butter the bread if you wish. Cut the slice in half, either crosswise or diagonally, as you would a sandwich. Spread 1 tablespoon of jam on one toast half. Scoop and spread 1/4 cup slightly softened ice cream across the other half. Sandwich the two together and enjoy while the toast is warm.
Option 1, TAKE IT EASY: For each sandwich, mix 2 teaspoons of peanut butter with 1 teaspoon of honey and swirl into a scoop of softened vanilla ice cream. Use your favorite jam, jelly or fruit spread in place of the Berry Ribbon.
Option 2, DRESS IT UP: For extra peanut punch, press the sides of the sandwiches in Honey-Roasted Peanut Brittle (see book for recipe).
BERRY RIBBON TWO WAYS | gluten free, dairy free
Sweetening berries, then evaporating and thickening some of their liquid, produces a colorful ribbon that remains soft when frozen. Blueberries won’t need to be strained, as their seeds are not as prominent.
Makes about 2/3 cup, depending on the type of berries
- 2 cups (about 300 g) raspberries, blackberries, blueberries, or other berries
- 6 tablespoons (75 g) granulated sugar
- 1 teaspoon fresh lemon juice
1. Stir the berries with the sugar in a saucepan over medium heat until they soften and become very juicy, about 5 minutes.
2. Puree the mixture with an immersion blender in the pot (beware of splatters—they stain!), or transfer to a blender or food processor and puree.
3. Pass the berries through a standard- or fine-mesh strainer into a bowl, stirring and pressing until only the seeds remain; discard the seeds. Return the syrup to the saucepan and simmer until syrupy and reduced to about 2/3 cup, 5 to 8 minutes. Stir in the lemon juice. Cool completely, then refrigerate in an airtight container until cold.
-------------------------------------------------
So...who wants to win a copy of this amazing cookbook so you can whip up a batch of creative ice cream sandwiches in your own kitchen! To enter, simply leave me a comment below. Tell me you idea for the perfect creative ice cream sandwich combo, and make sure to leave your e-mail. Ill accept entries until 1159 pm on Monday 8/5. Ill notify the winner via e-mail the following day. Good luck!
Disclosure: The publisher provided me with a review copy of this cookbook to facilitate this feature. All opinions expressed are my own, and all photographs are provided by Sara Remington.
Saturday, February 14, 2015
Cooking Lights Mad Delicious Cookbook Giveaway Featuring Carnitas de Pollo

 I’m a long-time fan of Cooking Light magazine, because their recipes are healthy without sacrificing the big flavors that we crave. Tastes good + healthy for you = a recipe for success in my book! I recently received a copy of Cooking Light’s new Mad Delicious cookbook to try out in my kitchen, and Im happy to say that its one of the best cookbooks Ive cooked from this year! The focus of the cookbook is the creative use of ingredients and cooking techniques to maximize flavor while reducing sugar, salt, and fat. The end result is food that tastes great and is healthier for you. Author Keith Schroeder has created an informative, fun-to-read cookbook that features a unique format. Mad Delicious contains 126 recipes – both savory and sweet – that even novice cooks can feel confident preparing. Using a detailed and informative chart-style recipe format, Schroeder clearly explains why each ingredient in a recipe enhances its overall flavor and texture. This format helps readers easily understand how a recipes ingredients interact.
 With a conversational writing style, he walks the reader step-by-step through the preparation of every recipe. When the dish is complete, you have delicious food to enjoy -- as well as insightful knowledge about ingredients and cooking techniques. The photography in the book is gorgeous and colorful too -- every recipe features at least one photograph! This cookbook is a fantastic cooking resource, no matter your skill level in the kitchen. While looking over my copy, several recipes quickly caught my eye! Among them are: Georgia Peanut Fried Chicken -- which includes peanut butter powder in the crispy coating, Twice Cooked Garlic Shrimp, and slow-braised Carnitas de Pollo. As soon as I saw carnitas made with chicken, I knew I had had found my first recipe to try!
Carnitas are normally made with succulent pork slow cooked in its own fat. It’s delicious – but very high in fat. Schroeder’s version reduces the fat by using boneless, skinless chicken thighs slowly braised in a rich cooking liquid. The end result contains just 7.8 grams of fat per serving, but the tender meat has a rich depth of flavor. The only change I made to the recipe in the cookbook is using skinless bone-in chicken thighs in place of boneless, skinless thighs. That’s what I had in my freezer, but the bones were easily removed at the end of the braising time. This dish is also a winner because it’s economical and uses staple ingredients that I have on hand in my kitchen nearly all the time. This recipe makes enough carnitas de pollo for a dozen tacos. Schroeder recommends topping the finished tacos with a pickled onion recipe from the book. I decided to top our tacos with reduced-fat Monterrey Jack cheese and spicy pico de gallo. This is one amazing recipe!
Carnitas de Pollo
from Cooking Lights Mad Delicious

Ingredients:
- 2 lbs. skinless, boneless chicken thighs
- 1 tsp. kosher salt
- Cooking spray
- 2 cups sliced yellow onion (about 1 large)
- 6 garlic cloves, halved
- 2 cups water
- 12-ounce bottle light beer
- 1/2 cup fresh orange juice
- 1/4 cup fresh lime juice
- 1 tbs. brown sugar
- 12 6-inch corn tortillas
- 2 limes, cut into wedges
Directions:
Step 1: On a cutting board, rub the chicken thighs with the salt. Transfer to a plate momentarily.
Step 2: This is the time to break out your top-quality Dutch oven or heavy-bottomed pot. Heat the Dutch oven over medium-high heat and spray evenly with cooking spray.
Step 3: Lay down the chicken thighs in a single layer and cook 12 minutes or until theyre well browned before turning. Flip the thighs over and cook 8 minutes or until browned. You want them to be quite crusty, the point of almost seeming overcooked. Fret not, youll add some liquid to rehydrate the dish in a moment.

Step 4: When the chicken thighs resemble roasted chicken thats been accidentally left in the oven overnight with the pilot light on, theyre ready for the onions and garlic. Tumble about for a minute or so.

Step 5: Add 2 cups of water and the beer, and bring to a simmer. Lower the heat and simmer robustly at a steady, constant bubble for about an hour and 20 minutes, uncovered, or until the liquid is about 1/4 cup from being fully evaporated.

Step 6: Now, add the orange juice, lime juice, and brown sugar, and continue to cook and turn the thighs, about 2 minutes or until the chicken pieces are nicely glazed and nearly falling apart. Turn off the heat.
Step 7: After about 10 minutes, when the chicken is cool enough to handle but still quite warm, remove the chicken and tear it into bite-sized pieces. Combine the pulled chicken with the cooked onions and soft garlic.

Step 8: Platter and serve with warm corn tortillas and lime wedges.
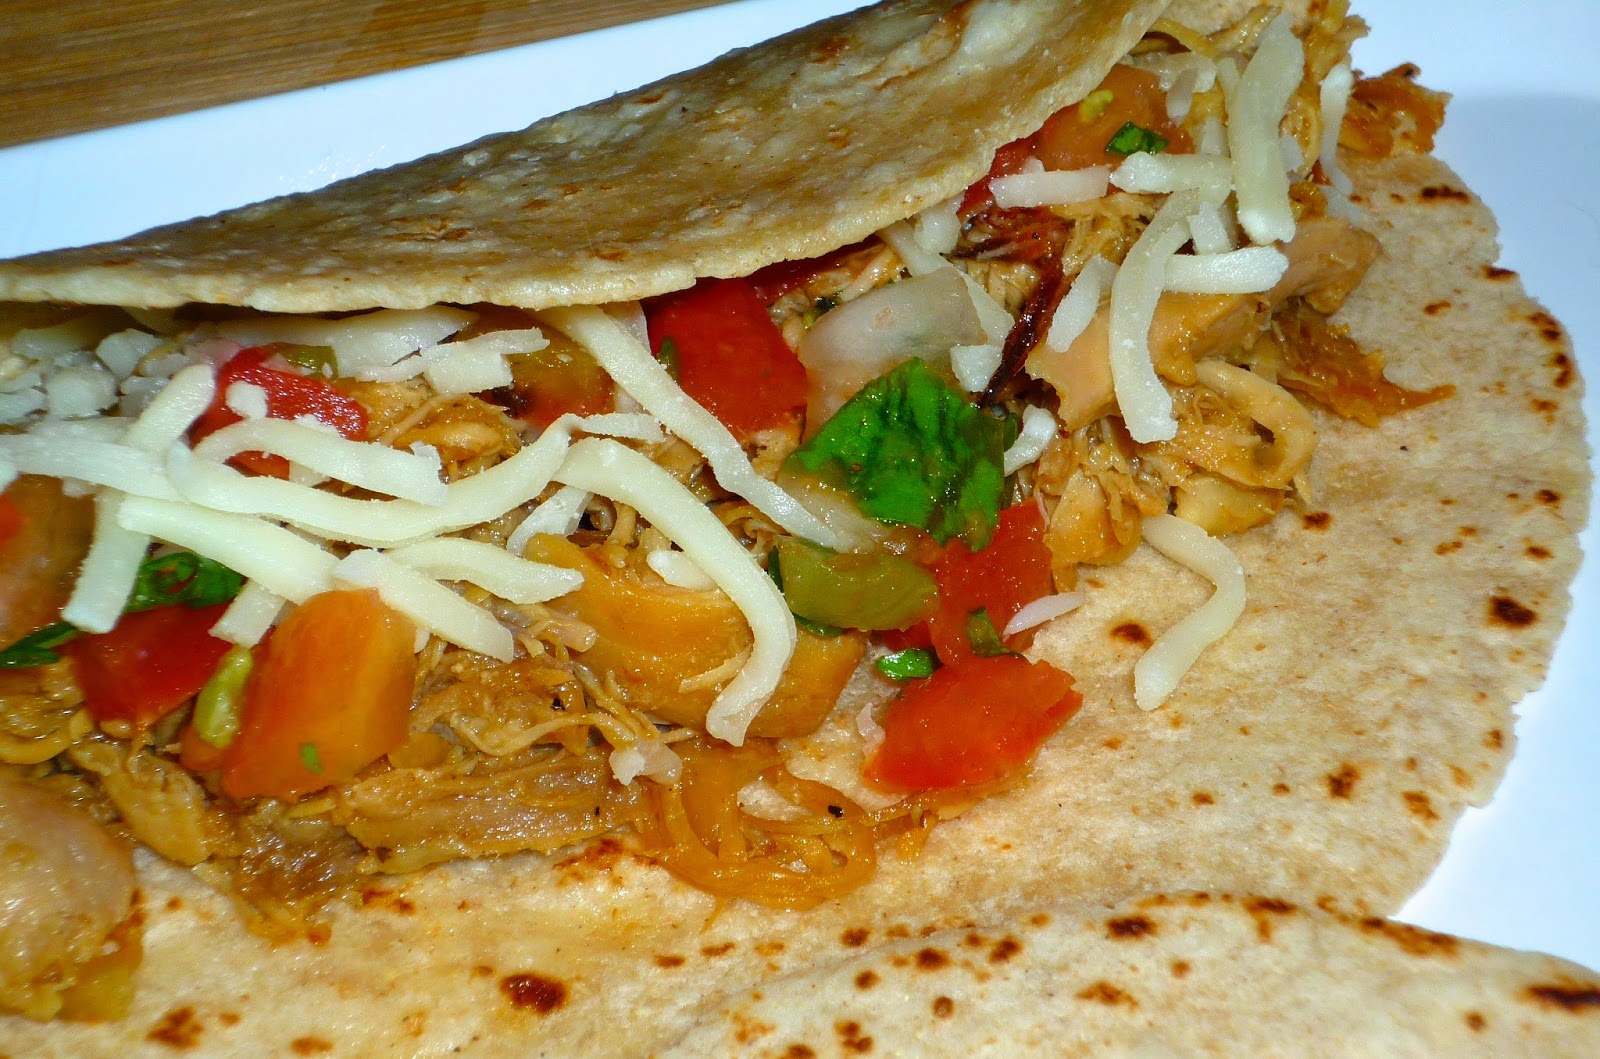
I can’t begin to tell you how much we loved these tacos! The meat is juicy, with a rich depth of flavor thanks to the slow braise in the beer-onion-garlic mixture. The orange and lime juices provide a subtle brightness, and the small amount of brown sugar allowed the chicken to caramelize nicely on the outside. I can see this recipe becoming a part of my go-to recipes rotation, and its also excellent for feeding a crowd without breaking the bank. The fact that it’s lower in fat than traditional pork carnitas is a definite plus too!
I can’t wait to try more recipes from Mad Delicious in the coming weeks and months. The cookbook can be purchased via Amazon and would be a fabulous holiday gift for the health-conscious foodies on your shopping list! The publisher is also going to give one lucky reader a copy of Mad Delicious so you can try out all of these amazing recipes in your kitchen! To make it totally easy, this giveaway only requires you to comment below letting me know your best trick for cooking recipes that are lower in fat, sugar, and calories – without sacrificing flavor. I’ll accept entries until Monday, November 24th at 11:59 p.m. Be sure to include your e-mail address, because the winner will be notified via e-mail the following morning. Good luck!
Disclosure: I received a complimentary review copy of Mad Delicious to facilitate this feature. However, all opinions expressed are solely my own.
Texas Brew Salsa 3 Pack Giveaway Featuring Sweet Heat Buried Treasure Meatballs

One of my favorite things about blogging is sharing new food finds …and I LOVE it when I get to feature Texas-based companies! Today, I’d like to tell you about a product that’s based right here in San Antonio: Texas Brew Salsa. Owner Brenda Craig produces a wide variety of fire-roasted salsas in varying degrees of heat…including a line of delicious fruit-infused salsas that combine heat and sweet! Her all-natural salsas contain ingredients like fire-roasted tomatoes, roasted chipotle peppers, roasted poblano peppers, roasted onions, cooked black beans, sweet corn, real peaches, real roasted pineapple, real mangos, and real apples. Brenda recently sent me a few jars of salsa to sample and share my thoughts with you.

First up was what I like to call The Chip Test. We opened a big bag of tortilla chips and cracked open six jars of salsa in the following flavors: Fire-Roasted Poblano, Medium Honey-Roasted Chipotle, Hot-Iron Habanero, Honey-Roasted Mango, Honey-Roasted Pineapple, and Honey-Roasted Apple Cinnamon. We enjoyed all of the flavors – you can definitely tell this salsa is made from fresh, quality ingredients. I have to confess that I am a bit of a wuss! The hot habanero was almost too spicy for me. That said, Michael actually proclaimed the habanero his favorite…so its perfect if you like your salsa muy caliente! My personal favorite was the unique Honey-Roasted Chipotle. The smoky flavor of the chipotle was met with just a touch of sweetness in the background. Add in a salty chip, and you’ve got a winning flavor combination. The fruit salsas had a nice balance of sweet and heat, and I’d love to play around with those in a dessert recipe sometime!
I decided to create an original recipe using two flavors of Texas Brew salsa, so I went to my kitchen and got to work. I came up with Sweet Heat ‘Buried Treasure’ Meatballs. These juicy meatballs are seasoned with all sorts of goodies, including a healthy dose of Texas Brew’s Medium Fire-Roasted Poblano salsa. After baking in the oven, the meatballs are glazed in a flavorful sauce containing BBQ sauce and a jar of Texas Brew’s Honey-Roasted Pineapple salsa. These meatballs are seriously good…and really easy to make!
Sweet Heat ‘Buried Treasure’ Meatballs
a Weekend Gourmet Original

Step 1: Add the following ingredients to a large mixing bowl: ½ lb. 93% lean ground beef, ½ lb. ground pork, ½ cup Texas Brew Fire-Roasted Poblano Salsa, 2 sliced green onions, 2 grated garlic cloves, 1 tbs. cilantro paste (or chopped fresh cilantro), 1 cup crushed tortilla chips, 1 egg, 1 tsp. cumin, a few grinds of black pepper, and 1 tsp. garlic salt. Using pristinely clean hands, combine ingredients just until combined – be gentle.

Step 2: Preheat oven to 375. Divide the mixture into 12 portions – approximately 2 tbs. Insert one cube of co-jack cheese in the middle, then roll the meatball around the cheese cube. Place the meatballs on a rimmed baking sheet that’s been lined with parchment. Bake for approximately 20 minutes, until the meatballs are cooked. Don’t panic if a few of the meatballs start to ooze melted cheese…those are good for taste testing!


Step 3: While the meatballs are baking, make the sauce. Add 2 cups of your favorite BBQ sauce and 1 jar of Texas Brew Honey-Roasted Pineapple salsa to a high-rimmed non-stick pan. Combine with a whisk and cook over medium heat. When the meatballs are cooked, add to the sauce and use tongs to coat them in the glaze. Let them simmer in the sauce for a few minutes while you pour drinks and get the plates ready. I served three meatballs and a spoonful of the sauce over Mexican rice. It’s fun to cut into the meatballs and see the cheese inside…like buried treasure!


These meatballs were really good…so good that Michael cleaned his plate and asked for seconds. Husband-approved is one of the best recipe endorsements I can give! The meatballs are moist, with just enough spice…and the cheesy middles are yummy and fun! The sauce is a little spicy, a little sweet, and a little smoky….an addictive combo that pairs really nicely with the meatballs. This meat mixture is versatile too! Michael thought it would make great meatloaf. For appetizers, simply make the meatballs slightly smaller and add a sturdy toothpick. Heck, I’m thinking that they’d make a great crockpot-friendly Super Bowl food!
Now for the best part: Texas Brew Salsa is going to give one of you a 3-pack of their salsa! Two of the jars will be the ones featured in these meatballs so you can recreate this recipe in your kitchen, and the third jar is Medium Honey-Roasted Chipotle. You can enter up to three times to win. For the first entry, visit the Texas Brew Salsa website, then come back and leave a comment letting me know which flavor caught your eye.. For a second entry, Like Texas Brew Salsa on Facebook and come back and leave a second comment. For a third entry, follow Texas Brew Salsa on Twitter and come back to leave me a third comment. Entries will be accepted through this Sunday 1/27 at 1159 p.m. The winner will be selected at random and notified on Monday 4/28. Good luck!!
Holiday Giveaway Sponsored by O Olive Oil
 |
| O Olive Oil Gift Set: O Cassis Vinegar + O Organic Blood Orange Olive Oil |
O how I love O Olive Oils artisan vinegars and organic citrus-crushed olive oils!
O boy am I excited that they have generously decided to sponsor this amazing giveaway!
O wow up to 10 lucky winners will receive a gift set of their choosing from Os spectacular Natural Box collection shipped to them free of charge! (Itll be like your own little holiday present to yourself!)
Maybe youll decide to pick the gift set at the top..
Or this one..
 |
| O Olive Oil Gift Set: O Organic Tahitian Lime Olive Oil + O Pomegranate Champagne Vinegar |
Or this one..
 |
| O Olive Oil Gift Set: O Organic Clementine Olive Oil + O White Balsamic Vinegar |
Or any one of the other gift sets available HERE. O decisions, decisions!
You already know that I love O Olive Oils products, and now I hope that you will get to try them and love them as much as I do.
All you have to do to enter is...
1) Leave a comment below telling me:
- which of the 9 different gift sets from the Natural Box collection you would like and
- what you would make with it (like "drizzle O Cassis Vinegar over sauteed broccoli", or if youre like me "drink O Pomegranate Champagne Vinegar straight from the bottle").
2) Include your email address so I can contact you if you win and so O Olive Oil can send you a special offer via email every now and then (you can always opt out later if you choose).
3) Must have a continental US shipping address in order to receive the prize.
Every 25th comment that satisfies all 3 of the above requirements will win the Natural Box gift set of their choosing. Up to 10 different winners.
This giveaway is open until 5:00pm Pacific time Thursday, December 16th, 2010, or until all 10 winners have been determined.
Be sure to tell your friends and family to participate - the more comments, the more chances to win!
PS - If youd like to be the first to know stuff like this in the future, be sure to:
- Sign up on the left under "Follow My Blog"
- or Follow Me on Twitter: @EnchantedCook
- or Like my Facebook page: TheEnchantedCook
~GIVEAWAY HAS CLOSED~
CONGRATS TO THE 5 LUCKY WINNERS
AND THANK YOU TO EVERYONE WHO PARTICIPATED!
AND THANK YOU TO EVERYONE WHO PARTICIPATED!
Thursday, February 12, 2015
Italian Chicken Orzo Soup Featuring a Gourmet Garden Refrigerated Herb Giveaway

After weeks of holiday-related indulgence, we’re really enjoying Lighten Up Month’s lighter, fresher menus. We’ve even decided to incorporate 1 or 2 meat-free days per week for our 2014 health-related change…we don’t use the word resolution in our house! We’re starting with Meatless Mondays in January and adding one more day in February. We couldn’t be vegetarian 100% of the time, but this seems like a great change to us. I’ll keep you posted on how it goes during the year and maybe even share some of our favorite veg-friendly recipes!
 One of our favorite Lighten Up meals in Winter is soup…they’re a hearty, warming meal-in-a-bowl. One thing I refuse to compromise on is flavor, which can sometimes happen when you reduce fat and calories in your dishes. I find that using lots of herbs and spices really helps fill the void left by using lower-fat products. One easy way to use more herbs in your cooking is with Gourmet Garden tubed herbs and garlic. They recently sent me a package containing 11 of their most popular varieties, including garlic, parsley, chili peppers, Italian herbs and basil. As soon as I saw this grouping, an Italian-inspired soup immediately came to mind. If you’ve never used Gourmet Garden products, you simply must…I am now hooked on them and plan to keep them in my fridge at all times! They use organic herbs...within 24 hours of being picked, they chop them just like you would yourself. Then, theyre packaged in handy squeeze tubes that allow you to use just what you need. They even stay fresh in the fridge for up to 3 months!
Gourmet Garden herbs and garlic worked perfectly in my Italian Chicken-Orzo Soup. It’s chock full of fiber-rich veggies: onion, celery, zucchini, mushrooms and tomatoes…for protein, I used lean chicken breast. The convenient Gourmet Garden herbs saved me so much chopping time, and they provided the Italian flavor that I wanted for this soup. You can use any pasta you like, but I opted for tri-color orzo. It cooks quickly and is an easy-to-spoon pasta. This was a hearty, healthy dinner that we enjoyed on a cold Texas night. It makes 4-6 servings and tastes even better after an overnight rest in the fridge.
Italian Chicken-Orzo Soup
a Weekend Gourmet Original

Ingredients:
- 1 tbs. olive oil
- 1 cup chopped yellow onion
- 2 stalks celery, sliced
- 1 cup chopped zucchini
- 1 cup sliced mushrooms
- 1 tbs. Gourmet Garden Chunky Garlic
- 1 tbs. Gourmet Garden Parsley
- 1 tbs. Gourmet Garden Italian Herbs
- 1 tsp. Gourmet Garden Chili Peppers
- 1 tbs. tomato paste
- 1 can petite diced tomatoes
- 6 cups chicken stock
- 1 lb. chicken breast, cut in bite-sized pieces
- Salt & pepper to taste
- 1 cup tri-color orzo
Directions:
Step 1: Heat the olive oil in a large Dutch oven over med-high heat. Add the onion and celery and cook until the onion is translucent. Toss the chopped chicken with a bit of salt & pepper, then add to the pan. Cook until the chicken is no longer pink. Add the Gourmet Garden Ingredients and stir well to combine.

Step 2: Add the diced tomatoes – juice and all – to the pot. Add the zucchini and mushrooms, then stir to combine. Bring to a boil, then lower the heat to med-low. Cover and simmer for 30-45 minutes.

Step 3: After the initial simmer, add the orzo. Cover and cook for 10-15 minutes longer, until the orzo is tender. To serve, ladle into deep serving bowls. If desired, top each serving with a spoon of grated parmesan. This soup is hearty and filling on its own, but a simple green salad would pair nicely with it.
 This soup is very comforting and filling…a healthy complete meal in a bowl! We loved the rich broth, the juicy chunks of chicken breast and the healthy veggies. The Gourmet Garden products provided the perfect Italian seasoning to the soup, and they were a snap to use. You can find Gourmet Garden products in the refrigerated section of the Produce department of many large grocery stores, near the bagged salads.

So...how would you like to try out Gourmet Gardens wide variety of fresh herbs in your kitchen? Well...youre in luck! The nice folks at Gourmet Garden are going to give one lucky Weekend Gourmet reader an insulated cooler thats filled with ELEVEN of their most popular products: Basil, Chili Pepper, Cilantro, Chunky Garlic, Dill, Garlic, Ginger, Lemon Grass, Oregano, Italian Herbs and Parsley. Just think of the amazing culinary creations youll be able to make! These herbs are perfect for saving time in the kitchen, and their flavor is fresh and bright. To enter the giveaway, simply follow the instructions below. Ill accept entries until 1159 p.m. CST this Friday, and Ill notify the winner this weekend. Good luck!
a Rafflecopter giveawayDisclosure: Gourmet Garden provided me with a selection of their herbs to facilitate the feature. I received no further compensation, and all opinions expressed are my own.
Subscribe to:
Posts (Atom)